

How to Reissue eMudhra DSC: A Complete Guide to Token Initialisation
How to Reissue eMudhra DSC: Losing or locking your eMudhra Digital Signature Certificate (DSC) can be a major source of stress. Whether your USB token is misplaced, locked due to too many incorrect PIN attempts, or simply broken, the result is the same: your digital signature becomes unusable, even if its validity period is still far from over.
In such a frustrating situation, what are your options? Is it possible to simply unlock the USB token? The answer is a definitive no. Since July 1, 2023, the Certifying Authority (CCA) has completely banned USB token unlocking systems for security reasons.
However, this does not mean your DSC is lost forever. There is a secure and officially recognized way to get a new copy of your digital signature certificate and prepare your old, locked token for reuse. This comprehensive guide will walk you through the entire process for eMudhra, from re-issuing your certificate to initializing your USB token.
The Solution – Understanding What a Certificate Re-Key Is
Before we start, it’s crucial to understand the official solution for a compromised or lost DSC.
Highlights- How to Re-download XtraTrust DSC: XtraTrust Certificate Re-issuance Guide
What is a Certificate Re-Key?
A Certificate Re-Key, or reissue, is the process of generating a brand new digital signature certificate to replace a previously issued one. The new certificate is created with a different public key and serial number for security purposes. Crucially, it holds the same characteristics and, most importantly, the same expiry date as your original certificate.
This process is the only authorized way to recover your digital signature after your token is locked or lost. eMudhra, as a certifying authority, follows this procedure, ensuring that subscribers can get a new certificate when their old one is compromised, as per the requirements set forth by the CCA.
How to Reissue eMudhra DSC (Manual Method)
Unlike some other Certifying Authorities, eMudhra’s re-issuance process is handled primarily through its customer care support. You will need to contact them directly to initiate the process.
Highlights- How to Re-download a Vsign DSC: Certificate Re-Key and Token Initialization
Step-by-Step Guide to Re-issuing Your eMudhra DSC: How to Reissue eMudhra DSC
- Prepare Your Details: Before you make the call, gather all the necessary information to verify your identity. This includes your registered email ID and the Application ID of your DSC. Having these details ready will ensure the call goes smoothly.
- Make the Call: Call eMudhra’s customer care number from your registered mobile number (the one you used to apply for your DSC). The number is 080 4615 6902.
- Calling Hours: Be sure to call between Monday and Saturday, from 9:30 am to 6:00 pm.
- Navigate the IVR and Speak with an Executive: Listen carefully to the IVR (Interactive Voice Response) options and select the number for support. It may take a few minutes for a customer care executive to answer, but they will eventually assist you.
- Provide Your Details: When an executive receives your call, provide them with your registered email ID and DSC Application ID. After verifying your details, they will process the re-issuance request.
- Receive Your New Application ID: Once the request is successfully processed, eMudhra will issue a new Application ID for your re-keyed certificate. This new ID will be sent to your registered email address within a short time. You can use this new ID to download your DSC.
What to Do with Locked Token?, How to unlock USB Token?
After you have a new Application ID for your digital certificate, you can prepare your old, locked USB token for reuse. As we mentioned, unlocking a token is no longer an option. However, you can format it so that it can be reused for your new digital signature.
What is Token Formatting (or Initialization)?
USB token formatting, or initialization, is a process that completely wipes all data and digital certificates from the device. This erases the incorrect PIN attempts and resets the token to its factory default state. After initialization, you can set a new password and download your re-keyed digital signature onto it.
Important Note: This process will permanently delete all digital certificates on the token. Make sure you don’t have any other important certificates on the token before you proceed.
The process for formatting a token varies depending on the brand. Below are step-by-step guides for the most common USB tokens.
Step-by-Step Guides to Initializing a USB Token
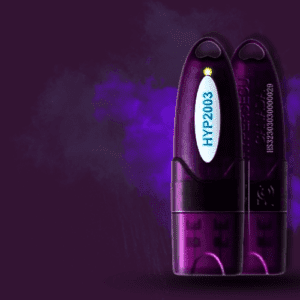
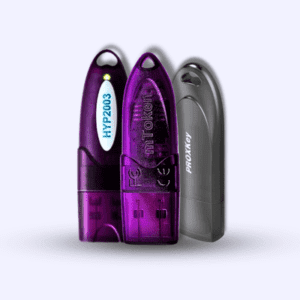
How to Unlock / Initialize HYP2003 Token
- Connect the Token: First, install the HYP2003 drivers and then insert your HYP2003 USB token into your computer. Ensure it is detected by the HYP2003 Token management software.
- Open the Initialization Tool: Download the HYP2003_Initialization_Tool file. Extract the ZIP file and open the
HYP2003_Initialization_Tool.exeapplication. - Click “Initialize”: In the software interface, you will see an “Initialize” button. Click it. A warning pop-up will appear, reminding you that all data on the token will be erased.
- Confirm and Proceed: Click “Yes” to proceed. Your HYP2003 token will now be initialized.
- Set a New Password: After formatting, the default password for the HYP2003 token is “12345678“. You can now use your token management software to set a new, secure password and download your re-keyed DSC.
How to Unlock / Initialize Proxkey Token
- Insert the Token: Insert your WD Proxkey token into a working USB port on your computer.
- Install Proxkey Driver: If you haven’t already, install the Watchdata Proxkey USB Token Driver.
- Open the Driver and use the Command: Open the Proxkey Token Driver application. With the application open, press the following keyboard command:
Ctrl + Alt + W. - Click “Admin” and “Initialize Token”: After pressing the command, an “Admin” option will appear. Click on it, then click “Initialize Token.” A warning pop-up will appear. Read it carefully and click “OK“.
- Set a New Password: The Proxkey token will now be initialized. The default password for the formatted token will be “123456“. You can now download your new DSC onto it after setting a new password.
How to Unlock / Initialize mToken
- Insert the Token: Plug your locked mToken into your computer’s USB port and ensure it is detected.
- Download the Initialization Tool: Download the mToken Initialization Tool from the official source.
- Extract and Open: The downloaded file will be in ZIP format. Extract the contents and locate the file named CryptoIDAInit.exe. Open this file.
- Find the Password File: Inside the extracted folder, you will also find a file named
password.txt. Open this file, copy the password, and paste it into the required field in theCryptoIDAInittool. - Click “Initialize”: Click on the “Initialize” button within the tool.
- Reinsert the Token: After the process is complete, remove the mToken from the port and plug it back in.
- Set a New Password: Your mToken is now unlocked. The default password for the initialized mToken is “12345678“. You can now set a new password and download your re-keyed DSC.
Important Note on How to Reissue eMudhra DSC
After formatting your USB token and re-downloading your digital signature certificate, it’s crucial to understand a key change: your new certificate will have a different serial number.
This means that wherever you had previously registered or associated your old DSC, you will need to re-register the new one. For example, if you were using your old DSC on the GST portal, and it got locked, you will need to register the new, re-downloaded DSC on the GST portal again. This is because the new certificate is a unique entity with a different identity, even though its other details remain the same. Always remember to update your DSC on any and all portals where it was previously registered.
Conclusion
We know that dealing with a locked or lost DSC can be stressful, but as this guide shows, the process of recovery is well-defined and manageable. By following the manual re-issuance process for eMudhra and using the correct initialization steps for your USB token, you can easily get a new digital certificate and get back to your online filings. This guide empowers you to resolve the issue yourself and continue your work without unnecessary delays.


Add comment