
How to Add a Digital Signature on NSWS Portal – Simple Guide for First Timers 2025-26
Add a Digital Signature on NSWS Portal: If you’ve ever tried dealing with government approvals, you’ve probably landed on the NSWS (National Single Window System) portal. It’s part of Startup India and is supposed to make approvals and registrations smoother.
But here’s the catch – before you can actually use it properly, you’ll need to add your Digital Signature Certificate (DSC). And that’s where most people get stuck. Wrong browser, missing emBridge, token password errors… the list goes on.
So, in this post, I’m going to walk you through the steps. Nothing too technical, just plain and simple instructions you can actually follow.

What You Need to Know Beforehand
Let’s clear a few basics first:
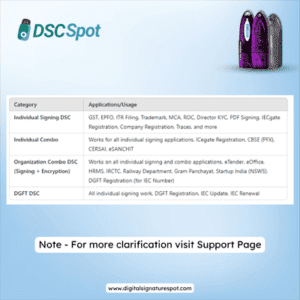
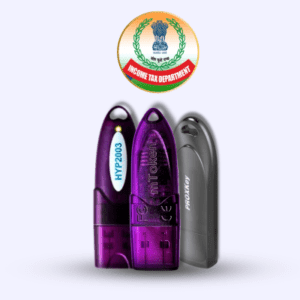
- A DSC is mandatory. You can buy one from any CCA-approved authority like Vsign, Pantasign, eMudhra, ProdigySign, etc. (always check the official CCA website).
- To connect your DSC with NSWS, you must install emBridge software. Without it, nothing will work.
- One DSC = One PAN. You can’t use one DSC with two different PANs.
- You can’t generate a DSC on NSWS itself. It must be purchased separately.
👉 Pro tip: Download emBridge only from the official link – emBridge.emudhra.com.
Step-by-Step: Add a Digital Signature on NSWS Portal via CRF
Here’s how I usually do it (and trust me, it works every time if you don’t skip steps):
- Install and Run emBridge
After installing, check if it’s running. On Windows, look at the bottom-right corner tray → click the emBridge icon. It should say Running. If it shows Stopped, restart it. - Go to Authorised Signatory Section
Open the CRF form on NSWS. Under “Authorised Signatory,” hit Add. Your PAN details should auto-fill. - Common Mistake Alert
If emBridge isn’t running, the system will throw an error. Make sure emBridge is live + PAN is filled in. - Select DSC Provider
From the drop-down, choose your DSC provider. - Choose the Right Certificate
Under the “Certificate” tab, you’ll see your DSC list (from the token or system). Pick the correct one. - Enter Token Password
Type your token password carefully. One wrong attempt and you’ll waste time re-doing. - Add Signature
Click Add Signature. - Success Pop-up
If everything went well, you’ll see: “DSC successfully registered with your PAN.” That’s it.
Adding DSC via Approval Form
If you’re filling an Approval Form, the process is even quicker:
- Scroll to the Attachments section.
- Upload your DSC like a file.
- Rest of the flow is the same as CRF.
Re-Registering DSC
At some point, your DSC will expire or you’ll need a new one. NSWS has a Re-Register option.
- Go to CRF → Authorised Signatory Details.
- Click Re-Register DSC.
- Do the same steps as before (provider → certificate → password → add signature).
Where to Ask for Help
Still stuck? Don’t panic. Here’s where you can reach out:
- Website: NSWS Help
- Email: contactus-nsws@investindia.org.in
- Phone: 1800 102 5841 (Mon–Sat, 9 AM – 6 PM)
Final Thoughts
Honestly, adding a DSC on NSWS looks technical the first time. But once you know the flow – install emBridge, plug token, select provider, enter password – it’s not rocket science.
I’ve done it multiple times for different firms, and the only real trouble happens when:
- emBridge isn’t running, or
- the wrong password is entered.
Fix those, and you’re good to go.
FAQs
Q1. Which DSC should I use?
It depends on your firm type. Proprietorship = Individual DSC. Company/LLP/Partnership = Organizational DSC.
Q2. Can I link one DSC with multiple PANs?
No. One DSC works with one PAN only.
Q3. Does NSWS provide DSCs?
No. You must buy from a CCA-approved certifying authority.
Q4. My DSC expired. What now?
Renew it from your provider and re-register it on NSWS.


Add comment